Step One:
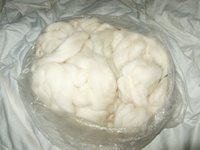
You need some roving. Roving, for those of you who do not know fiber terminology, is a strip of wool that has been processed in order to use for spinning. (This is about as simple as it gets) You can really use roving of any color you want, white, brown, striped, etc. Depending on the natural fiber you use, you'll get colors of varying tones! I use white. =) Next batch I might try black and white striped.
Step Two:
Knot strips of roving into ball-type thingies. Basically, wrap the strip of roving around your hand until you have a tail of about 6 inches or so and then tie that around what you wrapped around your hand.
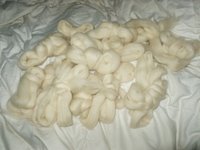
I have 13 balls here. Plenty!!!
Step Three:
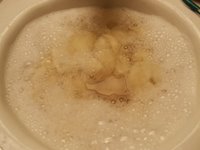
Now you're going to wash the roving, let it soak, give it a nice little bath. I like to let it soak in Ivory soap, it's gentle and mild. Perfect.

You'll let the balls soak for anywhere from half an hour to an hour in soapy water. You'll want the water to be hot, but not TOO hot. You also want to avoid using a lot of force on the little woolen balls because otherwise they'll felt and that's no good!! (At least not in this case)
Step Four:
This is the point where you'll get your utensils and supplies ready.
Utensils and Supplies:
1. Glass baking dish -- avoid using metal or something that could change color with dyes (i.e. white). Unless of course, you don't care about a dish getting dyed crazy colors
2. Saran Wrap or some other plastic wrap
3. Plastic cups
4. A plastic knife and spoon if you'd like
5. Paintbrushes if you'd like (I've found the sponge kind work best, plus they don't get dyed the color of the dyes)
6. Large bowl or measuring cup that can hold ~4 cups
7. White vinegar
8. Food coloring of your choice
9. Paper towels
10. Something to protect your hands
11. Microwave
12. Ziplock bag
13. Newspaper and a towel
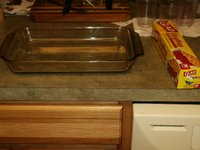
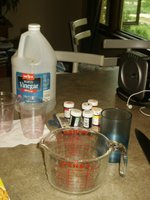
Okay, it's a long list, but it's all stuff that you should just have lying around the house.
Now what you'll do is mix about 1/4 cup of the vinegar with between 3 and 4 cups of water. Mix those two things together and then pour the water/vinegar solution into a plastic cup for each color that you want. Take your plastic knife or spoon and then mix the colors together. Note: You will need a lot of dye for dark colors. I learned this the hard way. My first yarns were all pastel colored. It bummed me out a lot.
So you have your colors and you're ready to dye your roving!!!
Step Five:
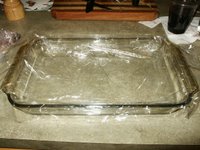
Lay Saran Wrap in your baking dish
Step Six:
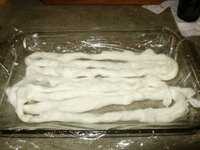
Now you're allowed to drain the water from the bath that your roving balls are soaking in. Take one, two or three balls of roving at a time, rinse them out (gently!!!!), squeeze them out (GENTLY!!!!) and then take them to your Saran Wrapped baking dish.
Step Seven:
Now you can officially start the dyeing process!
IMPORTANT: MAKE SURE THAT YOU ARE WEARING GLOVES! You don't want your hands to become purple or whatever color you're using (or maybe you do!).
Take a cup of dye. You can do this a number of different ways now, depending on what you like. Some people use squeeze bottles like the ones that ketchup come in, others like to use paintbrushes, others like to sprinkle on dye with spoons. Me? I like to just pour the dyes right on there. I take a cup, put my hand over it, and let the dye run between my fingers onto the roving.
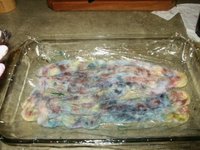
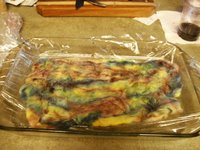
This is what the roving will look like after you've gotten it all dyed up. =)
Step Eight:
Once you have your roving substantially saturated with dye (and believe me, do NOT be afraid to really soak it up to the point where dye is oozing from the wool) you will roll it up into a nice little cinnamon bun (but don't eat it, please).
Fold in the long sides first, and then roll up. It should look like these...
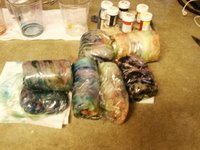
Step Nine:
Repeat above steps as often as necessary until you are all out of roving. It's time to cook it up!
Put all of your rolled up roving into a Ziplock bag. Get out as much air as you possibly can from the plastic bag and seal it well.
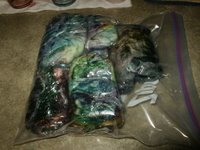
Pop it into the microwave for about 5 minutes, a little longer if you don't have a really powerful microwave (I have a very powerful microwave). Let it "cook" for about 2 1/2 minutes, stop it briefly and WITH OVEN MITTS (very, very important) flip the bag over and let it continue to cook.
If the bag pops, don't worry.
Have some newspaper ready for when the "cooking" is done. Take the bag of roving from the microwave WITH OVEN MITTS and wrap it in the newspaper.
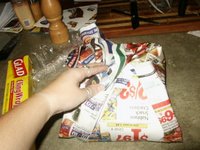
After wrapping it in the newspaper, wrap it up in a towel, then put it in a nice, undisturbed place to rest for about a day until it cools down.
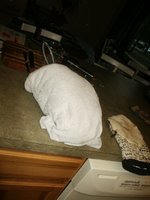
What to do after the roving is cooled will be continued tomorrow of the day after next once my roving is all nice and cooled! =)
And finally...
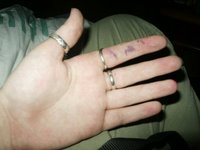
This is what happens when you don't wear gloves. And this just happened while mixing dyes. Silly, silly me. =P
And very, very finally!!
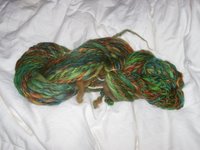
This is my crazy psychedellic yarn that came from the wool that I took a picture of on the spindle last week or so. There's about 75 yards of it.

2 comments:
Thank you so much for this tutorial! I'm going off to start right now! :)
Great tute! Thanks! I haven't been rolling my roving into balls before soaking. I'm going to get it right next time. ;) Have a great day!
Post a Comment