It's been a while! I've been knitting and crafting up a storm lately! Would you like to see some of my glorious FOs? Of course! =)
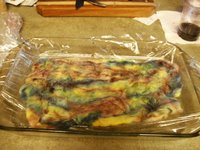
Some mittens for my boss. =) He seemed to love them! They're one of my favorite pair of mittens that I've ever knit (and I've knit a LOT of mittens!). I wanted to keep them for myself, people that I showed them to wanted them. They're really lovely though. Knit up in one of the Cascade 220 Heathers on US Size 5 dpns.
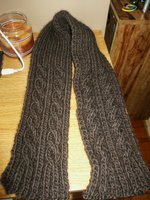
A very pretty scarf for my boyfriend. =) He will love it, I'm certain. Hopefully he doesn't realize that it's for him though as he saw me knitting it up.
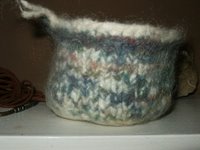
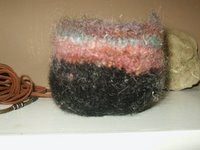
A couple felted bowls for members of my family. I actually knit one for each of my aunts and uncles out of spare yarn that I had spun and had no use for. These two are just my favorite. The white and blue one is going to my aunt and uncle, and the pinkish and black one is for my grandparents.
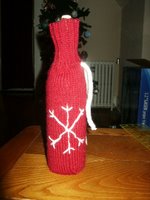
Finally, a winecozy that I knit up for my grandparents. I also just finished knitting one up today for my boyfriend's mother, which I have yet to finish up and embellish a bit. =)
I'm so glad school is over for the semester! Now I have time to knit and spin and do all sorts of fun stuff! =D
Sunday, December 17, 2006
Saturday, October 14, 2006
Clapotis!!
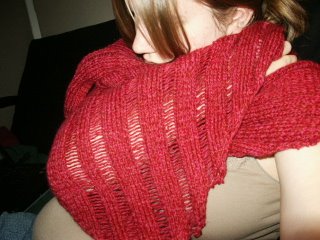
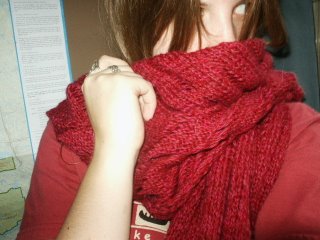
Took me about 2 weeks I think. I've gotten a ton of compliments on it while working on it in the anthropology lab and language lab. Heehee. It's finally done. I can't wait to wear it around!
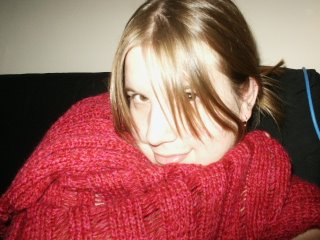
So here are a few pictures of me modelling it. Just for your viewing pleasure!
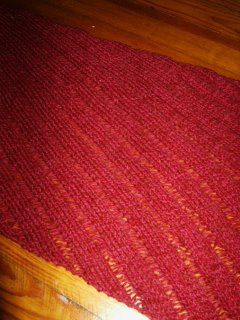
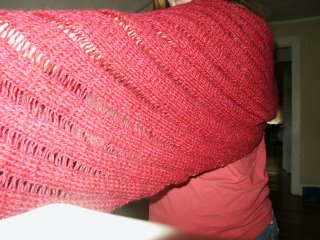
And a couple of technical pictures just for the fun of it =)
On the floor
Stretched out on my arm shawl-like
I'm a Clapotis bandit. =D
So here are a few pictures of me modelling it. Just for your viewing pleasure!
And a couple of technical pictures just for the fun of it =)
On the floor
Stretched out on my arm shawl-like
I'm a Clapotis bandit. =D
Saturday, October 07, 2006
Work in Progres...
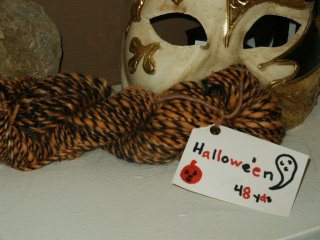
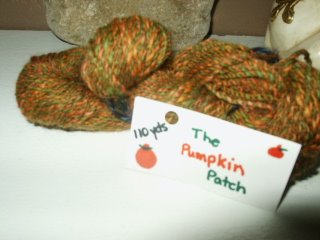
So I haven't posted to this in a while. I spun a couple of new autumnal yarns a while back: Halloween and Pumpkin-y like:
and
I love the Pumpkin Patch one. =)
Anyway, I'm not spinning for a while now because I'm knitting my Clapotis! Yay Clapotis! I've caught the Clap! (Oh....wait.......) It's turning out really pretty so far though. Knitting it with Cascade yarn. I'm happy. I'll definately post pictures once I'm finished.
Sunday, September 17, 2006
Cotton Candy Bubblegum!
I pimp out yarns like a pimp pimps out his ladies.
Bad analogy?
Anyway, I just finished my latest yarn. Started on it Friday, maybe yesterday, I can't even remember now...and finished it today.
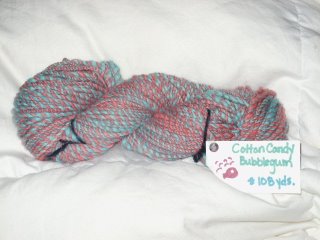
Started with dyeing some new blue roving on Friday night with some blue Kool-Aid (hey, I'm not going to drink it, might as well dye with it, right?) and ended up with a pretty pastel -- cotton candy blue color. Decided that I needed to mix it with my psychedellic pink roving that I had leftover from my strawberries and cream.
Aaawww, so pretty! =)
So I spent a lot of Saturday spinning (I felt really sick in the chest -- lots of coughing. Not fun) and I spent a LOT of today doing so as well.
After Family Guy this evening I wrapped it into it's respected skein and went to soak it for a while, beat it against the walls and bathtub -- I give it no mercy. And I now have this lovely skein of yarn!
I named it Cotton Candy Bubblegum because it looks exactly like that Bubblicious cotton candy bubblegum. And it kind of smells like it too. I'm rather proud of it too because I think it's the thinnest yarn that I've spun yet. I'm not sure what I'm going to do with it, but I might add it onto whatever I end up making for my boyfriend's niece. =)
Monday, September 04, 2006
Strawberries & Cream
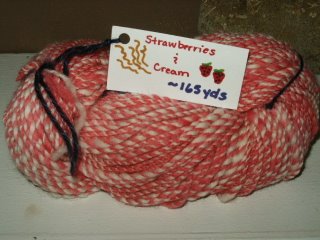
So with just a couple of days gone since I finished my Kool-Aid dyed yarn (which I may or may not do again...leaning towards not...) I've finished the yarn that I inteded to make with said roving!
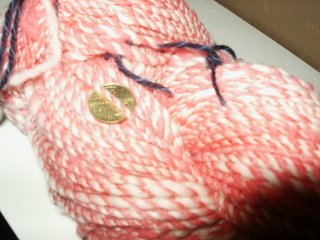
The first picture is truest to the color. The second is kind of crappy, but gives you an idea of the weight the yarn is (i.e. the coin is a 10 cent Euro piece -- closest coin that I could see out in the open -- it's about the size of a penny). I'm really, really pleased with how it turned out. I was a bit worried due to the shocking color of the roving and while I was spinning the individual strands it was REALLY tight, I wasn't sure if there was going to be enough of each...THEN while plying the yarn started kinking up on itself. ::shakes head:: Tricky, tricky yarn. But after beating it, soaking it, squeezing it, etc...I think that it's just about perfect. =) Now is the curious question about what I'm going to do with it. Maybe it will just sit out as decoration.
Saturday, September 02, 2006
Cotton Candy!
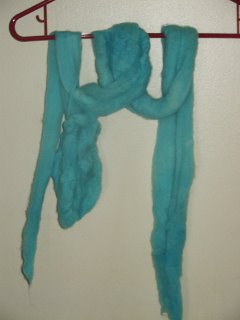
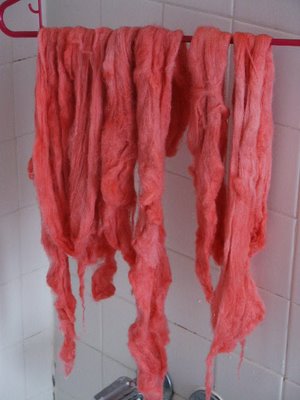
So this is my latest bit of dyed roving. I decided this time that I would try my hand at Kool-Aid dyeing. Really, really simple. A packet of Kool-Aid and some water. (I read somewhere 1 part Kool-Aid, 2 parts water) I used Black Cherry and Cherry, hoping for some variation in colors, but I pretty much ended up with bright pink...pink...and hot pink. I'm a bit gun-shy about trying Kool-Aid dyeing again since I was really hoping for a deep red and I obviously didn't get that at all. =(
...It is simple though...
Thursday, August 24, 2006
My First QUILT! (And A Skein of Yarn)
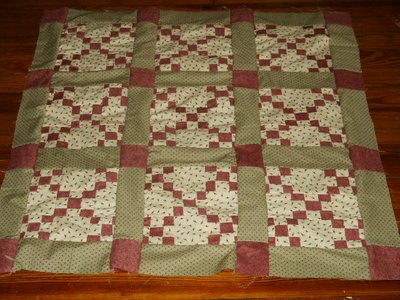
I am SOOOO excited! I just finished piecing together my FIRST QUILT EVER!!!!! =D =D =D I've been kind of working on it on and off again since May or June, but my sewing machine was broken, and I'm pretty awful and hand sewing. I cut a bunch of the small pieces when I first got my fabric and was able to sew together maybe one and a half strips and then my sewing machine completely crapped out on me. That was all I did until the end of July, broke down and decided that I needed to get it fixed -- no matter the cost.
The sewing machine fixings cost me about $25 I think, and I haven't had any problems since. Well...then I had another problem!! The green sashing in the middle and edges that I had originally bought was too little (misprint maybe???) and so last night, I went and bought some green fabric that was similar to the original that I bought back in May and I worked on it all last evening and this morning and I'm done piecing it together!!!
Here it is, laid out on my floor in all of it's glory. =D I would venture a guess that it's about 3'x3', maybe a little more. I haven't measured it yet. I have yet to actually quilt it and I need to put the backing fabric on and stuff, but other than that...gah! I love it! =D
And just so I keep in the spirit of knitting (haha, not that it's always necessary or anything...). I have to whore out my favorite yarn ever (that I've made, that is).
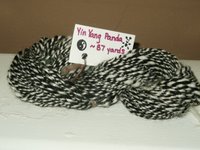
It's name is "Yin Yang Panda" and it's ~87 yards (as the card on it says). It's so nicely spun and even. It makes me so happy because it's the first wheel-quality yarn that I've spun on my hand spindle. I have no idea what I'm going to make of it. I might just keep it for decoration. Who knows!
Monday, August 21, 2006
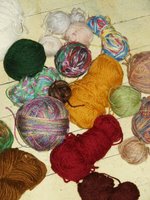
YARN PR0N!!!!
Hello. My name is Auna, and I am a yarnaholic.
Now, my yarn stash isn't nearly as bad as some peoples that I've seen. Except that whereas a lot of people have so much yarn they don't know what to do with it, I have so much useless yarn that I don't know what to do with it! =O
Now, I'm one of these people who, when they make something, they want to make something useful. Not little toys that will just sit in the closet collecting dust, or gifts that will be underappreciated, etc.
What do I do with my yarn? Take pictures of it and post it to my blog. What else?
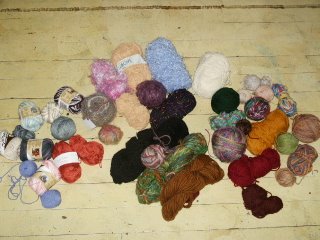
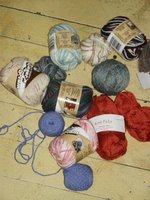
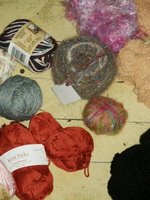
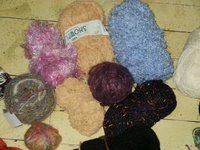
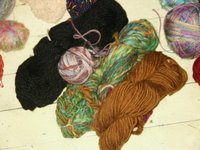
Here it is. All laid out in all of it's porny goodness.
Now, from left to right in more detail (oh I'm so dirty...)
These are the cottons. There are 5 (yes 5) skeins of Sugar 'n Cream. Some KnitPicks sport weight cotton (really lovely stuff!), and some Esprit sock yarn that I used for my Lolita Toes.
The two skeins in the middle here are my "fancy" yarns. One skein of beautiful and soft Noro (wool, angora and whatever else is in it...) that I bought from a LYS over half off for some reason. The second skein is leftovers of a lace weight alpaca. I need to find the pathetic excuse of a scarf that I made with it and frog it and make it into something much more lovely.
Here, next to the Noro and alpaca I have my novelty yarns. A really cool black w/ rainbow bits, some terry-cloth-esque yarn, some eyelash yarn. Nothing really spectacular. Something that I'll use for embellishments if anything.
My favorites! Some of my handspun yarn. =) Nothing really over the top spectacular, mind you. I think everything pictured there is under 100 yards and I have no idea what to do with any of it. =( Boooo
And finally, my wools and wool-like yarns that I'm not really sure if they're wool or not. There's a bit of KnitPicks in there, some dye-your-own stuff and some stuff from Hobby Lobby and Michael's. =)
And that's all...do not think though that this is all that I have! Because it's not! I have a couple more skeins of my own handspun stuff, and a couple other purchased skeins that I know what I'm going to use them for. Oh yarny yarn yarn.
Sunday, August 20, 2006
Long Time No Post!!!!
So I'm finally all moved into my apartment and I finally have some nice time to actually post what I've been doing the past couple of weeks!
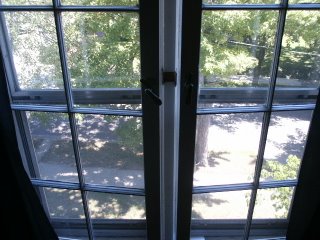
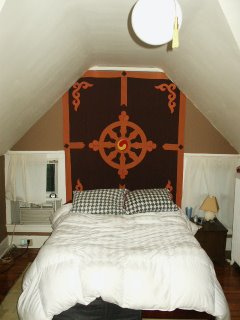
These are pictures of my favorite part of my apartment. The bedroom! =D The windows are the windows that look out on my street, right next to my desk...heehee. And the tapestry above the bed is my boyfriend's. I think he either bought it in Tibet or China. One of the two.
Now onto the crafty things!!!
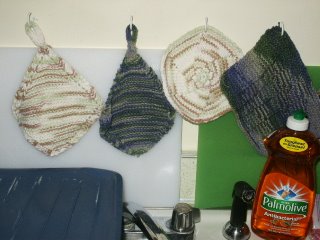
Here are 4 nice dishcloths that I knit before I moved in. This is my sink! =D
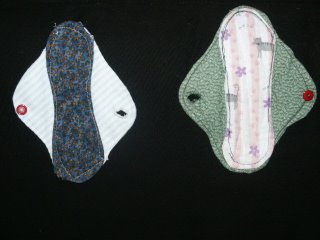
These are my cloth pads that I sewed (sidenote: HOORAY! MY SEWING MACHINE LIVES!!!!!!!!!!!!). Yes, they are pads. Like maxi pads. My boyfriend couldn't believe it when I made them. Haha. They're kind of crappy, but they are my first attempt at them, so I'm proud. =)
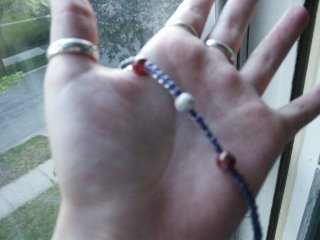
Here is a pretty necklace that I made just the other day. The large beads are Asian-ish, I wanted a cool pendant for the middle, but couldn't find one that I liked at the bead store, so I decided against it. I still really like it. =)
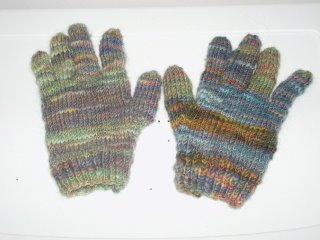
Gloves...pretty self-explanatory. =) The colors in each are a little different and weird, but I suppose that's what I get for using hand-spun yarn.
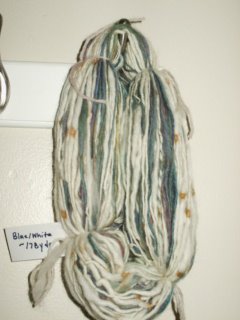
And here is a picture of the first skein of yarn spun in my new apartment! Hooray! Believe it or not, I spun all ~178 yards of it in one day! Crazy!!!!
Thursday, August 03, 2006
Give Me A Couple of Days
I haven't updated anything in about a week. I've been working on a couple of things here and there. Give me a couple of days though, I'm currently in the process of moving into a new apartment. =)
Wednesday, July 26, 2006
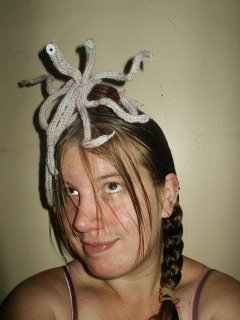
FLYING SPAGHETTI MONSTER!!!!!!!!!!!
This is my FSM that I created a couple of days ago whilst bored. =) I love him. He is my god. I will worship him...maybe. He doesn't like that though, so maybe I won't.
He's a bit effeminate because the only yarn that I had to spare was a pastel pink-blue color. Heehee.
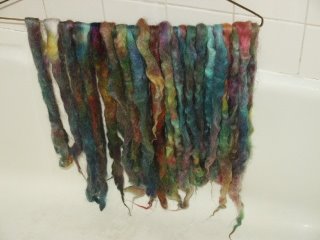
And my latest roving!!!!! =D Isn't it perdy? I'm currently in the process of spinning it up. It will be interesting to see how it knits up. =)
Tuesday, July 25, 2006
So YOU Want To Dye Roving? Part 2
Oh goodness, a bit of a delay. I've been lazy about uploading the pictures from my camera. The last part of the dyeing process is fairly simple anyway.
SO! The last few steps are as follows:
Step 1:
Unwrap your baby roving from it's towels and newspaper.
Step 2:
Fil your sink up with soapy water once again like you did when you went to soak your roving initially, same soap and same temperature is all fine.
Step 3:
Unwrap your roving. If you dye like me, it could be a tad messy. The roving should easily fall from the Saran Wrap. Dunk your roving into the sink and toss away the Saran Wrap.
Step 4:
Let soak for just a couple of minutes
Step 5:
Rinse out each individual strand of roving and hang it up to dry on a coathanger (or something similar is fine too) in the shower, or just someplace where it can drip dry and be left undisturbed.
Step 6:
After it's all dry, you're ready to spin! Congrats! =)
Note: For some reason Blogger isn't letting me upload images, so I'll upload the images of my finished roving once Blogger decides it likes me again.
Saturday, July 22, 2006
So YOU Want To Dye Roving? Part 1
So! I dye a lot of roving, why not write a tutorial about how to do it? =) This is really just for my own amusement. Take it however you want.
Step One:
You need some roving. Roving, for those of you who do not know fiber terminology, is a strip of wool that has been processed in order to use for spinning. (This is about as simple as it gets) You can really use roving of any color you want, white, brown, striped, etc. Depending on the natural fiber you use, you'll get colors of varying tones! I use white. =) Next batch I might try black and white striped.
Step Two:
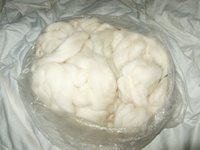
Knot strips of roving into ball-type thingies. Basically, wrap the strip of roving around your hand until you have a tail of about 6 inches or so and then tie that around what you wrapped around your hand.
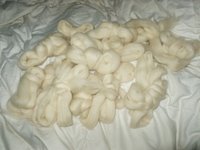
I have 13 balls here. Plenty!!!
Step Three:
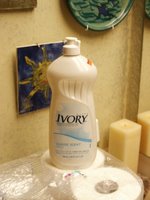
Now you're going to wash the roving, let it soak, give it a nice little bath. I like to let it soak in Ivory soap, it's gentle and mild. Perfect.
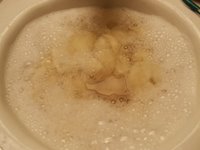
You'll let the balls soak for anywhere from half an hour to an hour in soapy water. You'll want the water to be hot, but not TOO hot. You also want to avoid using a lot of force on the little woolen balls because otherwise they'll felt and that's no good!! (At least not in this case)
Step Four:
This is the point where you'll get your utensils and supplies ready.
Utensils and Supplies:
1. Glass baking dish -- avoid using metal or something that could change color with dyes (i.e. white). Unless of course, you don't care about a dish getting dyed crazy colors
2. Saran Wrap or some other plastic wrap
3. Plastic cups
4. A plastic knife and spoon if you'd like
5. Paintbrushes if you'd like (I've found the sponge kind work best, plus they don't get dyed the color of the dyes)
6. Large bowl or measuring cup that can hold ~4 cups
7. White vinegar
8. Food coloring of your choice
9. Paper towels
10. Something to protect your hands
11. Microwave
12. Ziplock bag
13. Newspaper and a towel
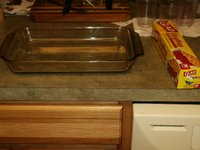
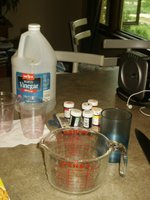
Okay, it's a long list, but it's all stuff that you should just have lying around the house.
Now what you'll do is mix about 1/4 cup of the vinegar with between 3 and 4 cups of water. Mix those two things together and then pour the water/vinegar solution into a plastic cup for each color that you want. Take your plastic knife or spoon and then mix the colors together. Note: You will need a lot of dye for dark colors. I learned this the hard way. My first yarns were all pastel colored. It bummed me out a lot.
So you have your colors and you're ready to dye your roving!!!
Step Five:
Lay Saran Wrap in your baking dish
Step Six:
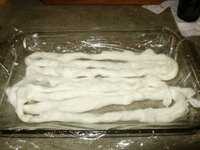
Now you're allowed to drain the water from the bath that your roving balls are soaking in. Take one, two or three balls of roving at a time, rinse them out (gently!!!!), squeeze them out (GENTLY!!!!) and then take them to your Saran Wrapped baking dish.
Step Seven:
Now you can officially start the dyeing process!
IMPORTANT: MAKE SURE THAT YOU ARE WEARING GLOVES! You don't want your hands to become purple or whatever color you're using (or maybe you do!).
Take a cup of dye. You can do this a number of different ways now, depending on what you like. Some people use squeeze bottles like the ones that ketchup come in, others like to use paintbrushes, others like to sprinkle on dye with spoons. Me? I like to just pour the dyes right on there. I take a cup, put my hand over it, and let the dye run between my fingers onto the roving.
This is what the roving will look like after you've gotten it all dyed up. =)
Step Eight:
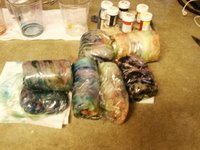
Once you have your roving substantially saturated with dye (and believe me, do NOT be afraid to really soak it up to the point where dye is oozing from the wool) you will roll it up into a nice little cinnamon bun (but don't eat it, please).
Fold in the long sides first, and then roll up. It should look like these...
Step Nine:
Repeat above steps as often as necessary until you are all out of roving. It's time to cook it up!
Put all of your rolled up roving into a Ziplock bag. Get out as much air as you possibly can from the plastic bag and seal it well.
Pop it into the microwave for about 5 minutes, a little longer if you don't have a really powerful microwave (I have a very powerful microwave). Let it "cook" for about 2 1/2 minutes, stop it briefly and WITH OVEN MITTS (very, very important) flip the bag over and let it continue to cook.
If the bag pops, don't worry.
Have some newspaper ready for when the "cooking" is done. Take the bag of roving from the microwave WITH OVEN MITTS and wrap it in the newspaper.
After wrapping it in the newspaper, wrap it up in a towel, then put it in a nice, undisturbed place to rest for about a day until it cools down.
What to do after the roving is cooled will be continued tomorrow of the day after next once my roving is all nice and cooled! =)
And finally...
This is what happens when you don't wear gloves. And this just happened while mixing dyes. Silly, silly me. =P
And very, very finally!!
This is my crazy psychedellic yarn that came from the wool that I took a picture of on the spindle last week or so. There's about 75 yards of it.
Step One:
You need some roving. Roving, for those of you who do not know fiber terminology, is a strip of wool that has been processed in order to use for spinning. (This is about as simple as it gets) You can really use roving of any color you want, white, brown, striped, etc. Depending on the natural fiber you use, you'll get colors of varying tones! I use white. =) Next batch I might try black and white striped.
Step Two:
Knot strips of roving into ball-type thingies. Basically, wrap the strip of roving around your hand until you have a tail of about 6 inches or so and then tie that around what you wrapped around your hand.
I have 13 balls here. Plenty!!!
Step Three:
Now you're going to wash the roving, let it soak, give it a nice little bath. I like to let it soak in Ivory soap, it's gentle and mild. Perfect.
You'll let the balls soak for anywhere from half an hour to an hour in soapy water. You'll want the water to be hot, but not TOO hot. You also want to avoid using a lot of force on the little woolen balls because otherwise they'll felt and that's no good!! (At least not in this case)
Step Four:
This is the point where you'll get your utensils and supplies ready.
Utensils and Supplies:
1. Glass baking dish -- avoid using metal or something that could change color with dyes (i.e. white). Unless of course, you don't care about a dish getting dyed crazy colors
2. Saran Wrap or some other plastic wrap
3. Plastic cups
4. A plastic knife and spoon if you'd like
5. Paintbrushes if you'd like (I've found the sponge kind work best, plus they don't get dyed the color of the dyes)
6. Large bowl or measuring cup that can hold ~4 cups
7. White vinegar
8. Food coloring of your choice
9. Paper towels
10. Something to protect your hands
11. Microwave
12. Ziplock bag
13. Newspaper and a towel
Okay, it's a long list, but it's all stuff that you should just have lying around the house.
Now what you'll do is mix about 1/4 cup of the vinegar with between 3 and 4 cups of water. Mix those two things together and then pour the water/vinegar solution into a plastic cup for each color that you want. Take your plastic knife or spoon and then mix the colors together. Note: You will need a lot of dye for dark colors. I learned this the hard way. My first yarns were all pastel colored. It bummed me out a lot.
So you have your colors and you're ready to dye your roving!!!
Step Five:
Lay Saran Wrap in your baking dish
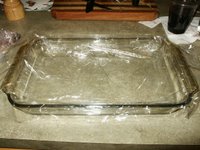
Step Six:
Now you're allowed to drain the water from the bath that your roving balls are soaking in. Take one, two or three balls of roving at a time, rinse them out (gently!!!!), squeeze them out (GENTLY!!!!) and then take them to your Saran Wrapped baking dish.
Step Seven:
Now you can officially start the dyeing process!
IMPORTANT: MAKE SURE THAT YOU ARE WEARING GLOVES! You don't want your hands to become purple or whatever color you're using (or maybe you do!).
Take a cup of dye. You can do this a number of different ways now, depending on what you like. Some people use squeeze bottles like the ones that ketchup come in, others like to use paintbrushes, others like to sprinkle on dye with spoons. Me? I like to just pour the dyes right on there. I take a cup, put my hand over it, and let the dye run between my fingers onto the roving.
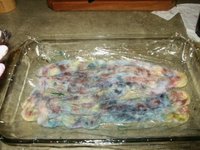
This is what the roving will look like after you've gotten it all dyed up. =)
Step Eight:
Once you have your roving substantially saturated with dye (and believe me, do NOT be afraid to really soak it up to the point where dye is oozing from the wool) you will roll it up into a nice little cinnamon bun (but don't eat it, please).
Fold in the long sides first, and then roll up. It should look like these...
Step Nine:
Repeat above steps as often as necessary until you are all out of roving. It's time to cook it up!
Put all of your rolled up roving into a Ziplock bag. Get out as much air as you possibly can from the plastic bag and seal it well.
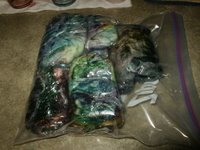
Pop it into the microwave for about 5 minutes, a little longer if you don't have a really powerful microwave (I have a very powerful microwave). Let it "cook" for about 2 1/2 minutes, stop it briefly and WITH OVEN MITTS (very, very important) flip the bag over and let it continue to cook.
If the bag pops, don't worry.
Have some newspaper ready for when the "cooking" is done. Take the bag of roving from the microwave WITH OVEN MITTS and wrap it in the newspaper.
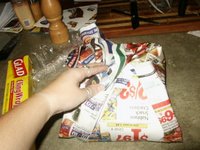
After wrapping it in the newspaper, wrap it up in a towel, then put it in a nice, undisturbed place to rest for about a day until it cools down.
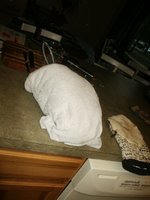
What to do after the roving is cooled will be continued tomorrow of the day after next once my roving is all nice and cooled! =)
And finally...
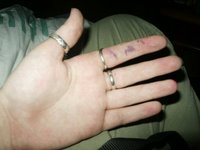
This is what happens when you don't wear gloves. And this just happened while mixing dyes. Silly, silly me. =P
And very, very finally!!
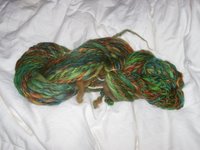
This is my crazy psychedellic yarn that came from the wool that I took a picture of on the spindle last week or so. There's about 75 yards of it.
Subscribe to:
Posts (Atom)